Okay, now that that's out of the way, let's get started. You'll only need a few supplies:
Felt: I just bought small craft sheets of grey and white felt for the teeth and gums, but you'll need to buy it off the bolt for the body of the shark, 1/2 yard should be sufficient.
Basic sewing supplies: scissors, thread, sewing machine etc.
This pattern: Click here to view
Cut out the pattern pieces. In addition you'll need to cut the following:
2 strips of blue (or main color) for the handle: 16 inches by 1 1/2 inches
2 strips of grey (or gum color): 1 inch by 9 inches, and 1 inch by 12 inches
2 strips of white (or teeth color): 1 1/2 inches by 8 1/2 inches, and 1 1/2 inches by 11 1/2 inches
Now these pictures will seem odd because the bag is already mostly assembled. However, I learned the hard way that it's much easier to add the eyes and gill embellishments before assembly than after. So I would suggest that you do those first.
I simply sewed the black felt eyes on to the main head pieces and then marked chalk lines where I wanted the gills, and stitched a small tight zigzag.
Sandwich the fin in between the two head pieces in the spot indicated on the pattern. So you'll have the head pieces right sides together with the fin in between.
 Sew the side seams.
 Turn the bag right side out and your shark is already taking shape (remember that your piece will already have the eyes and gills on at this stage).
 Now, let's work on the teeth. Overlap the white strips with the grey gum strips. They should overlap by about a 1/2 inch. Sew in place.
 Cut your teeth shapes. I just freehanded this but you could make a template if you prefer. I rounded the teeth but if you want a more realistic shark you could certainly make them smaller and pointier. Notice how the gum strips are slightly longer. I rounded the edges of the gums with my scissors so they would recede into the mouth.
 Before we can attach the teeth to the head, we need to assemble the strap. Lay your two 1.5 inch by 16 inch strips on top of each other and stitch together.
 Now place the strap directly on the edge of the shark's top lip, at the seam. Place the longer set of teeth/gums on top of the strap and pin along the upper lip. Sew in place.
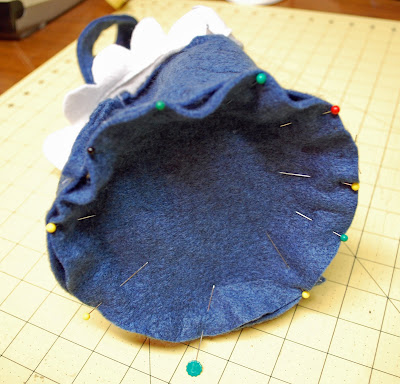
 The bottom teeth are a little trickier because you'll need to bring the strap over and around underneath the bottom teeth. See picture for a better explanation. Be careful not to twist the strap when pinning it in.


