Monday, December 19, 2011

Because there aren't enough felt versions of the Hall of Justice in this world.

The best thing about making gifts by hand is that they are completely and totally unique. That's what I loved so much about this project that I created for my best friend's little boy for Christmas.

Now Avery is all about superheroes. The kid is frighteningly obsessed with them for a kid so young, and he's got tons of superhero dress up toys, action figures and playsets etc. What he didn't have, was portability...and a swamp made out of felt. That's where I came in.

Behold, the portable superhero felt playmat house.

I based most of my design on the old Justice League cartoons I used to watch. So I had to have some water for Aqua Man, a forest for the Amazonian, Wonder Woman ,the Hall of Justice and the Hall of Doom of course, and then since Batman is both a favorite of mine and Avery's I did a mini Gotham City complete with Bat Signal. I was a little stumped as to what to do next. I attempted Superman's fortress of solitude, but in felt it just looked like a really weird teepee. I ended up doing a section of space instead since superheroes are eager to share their powers with those on other planets as well.

Now I wish I had come up with the idea for this playmat on my own, but I didn't. Check out Cook Clean and Craft's awesome tutorial here for instructions on how to make your very own.

Hers is a more traditional car playmat but I changed a few things in mine. Obviously, I changed the theme of the playmat, but I also sewed all of my pieces on instead of glueing. I think in general glueing felt is fine. However, the child this is going to once pulled the descriptive plaque off of a museum display with his bare hands, and I've personally witnessed his little sister reduce a cell phone to nothing but metal filings and broken plastic chunks. So, it needed to be extra durable.

Plus, I loved being able to create texture, depth and interest with the stitching.


However, sliding this huge felt playmat under my machine while trying to delicately stitch around each tiny piece of felt got pretty tiresome after a while.


At about hour 12 of this project, I turned to my husband and said, "You know I don't really like that kid this much anyway."

I persevered though, if only for the glory of being able to claim that I recreated the Hall of Doom and it's swampy locale in felt.


All in all I'm thrilled with it and I think it's going to be a hit, especially since my kid's can't seem to stop playing with it.


The best part is that it all folds up into this cute little house/scyscraper and his guys can be stowed away inside.

All ready for a road trip, daycare or a trip to Aunt Amy's house!

Wednesday, November 30, 2011

Near-incoherent rambling, which I suppose makes me sassy and creative which then reinforces that I am that which I hate!

May I vent? Thank you.

I peruse a fair amount of crafting blogs because I’m a crafter, I’m always looking for new ideas, and I need to keep up with current crafting trends to try and make my Etsy shop successful. There are certain sites that I like more than others and I was trying to pinpoint why that is and I think I figured it out the other day.

There are a lot of guest bloggers on this particular site, you know the whole, “today we have a guest post from Yolanda of Immorecreativeandthinnerthanyou.com and she’s going to show us how she made this fabulous ruffled burlap poached egg cozy”. Which is then followed by a short introduction about how sassy and funny and creative Yolanda is. Then Yolanda gets to chime in and show us how creative and sassy and funny she is by free forming a few sentences about herself which only proves that she thinks she’s sassy but she’s really not.

This of course includes a description of how she left her fortune 500 job to stay at home with her adorable children who are the light of her life (insert photo of her looking like a recently retired runway model, her husband who just looks whipped, and her perfectly coiffed children dressed in Gap fashions sitting on a fabulous vintage couch set in the middle of a field and photoshopped so that the couch and the people are in color and the rest is in artsy black and white and the photographer did that thing where they tilted their camera at an angle, because you know they were too sophisticated to take straight photos).

Then comes the tutorial in which we get a view of Yolanda’s crafting area which of course is its own separate room and furnished to look like a Martha Stewart Crafts magazine layout. Oh and she’s doing this while her sweet lovely children are napping, or attending the local Montessori academy. And well, at that point I just start getting a little sick. I know Yolanda is not as perfect as she seems. I know that just out of camera shot she’s probably got a pile of laundry and an empty bottle of booze. But when you’ve seen 20 guest bloggers and they all are so good at pulling off this perfect sassy, creative, fun mommy crafter thing, it just starts to really make me feel inadequate.

I work 48 hours a week. I can only get something done in the wee hours of the morning or when I’m allowing my children to rot their brains out with excessive video gaming. My crafting space is wedged in the corner of my basement between the litter boxes and our far too extensive collection of Rockband guitars, and my children haven’t posed for a decent photo without making a goofy grin or having their hand in their mouths or in their pants since they were 1. I can’t remember the last time I had the courage to look at myself in a full length mirror, and when I walk through the mall, those gals at the eyebrow threading kiosk practically beg me to get my eyebrows done- not because they want the business but because they really think they’ll be doing society a favor by taming the two caterpillars currently residing above my eye sockets.

So I’ve decided to take a break from craft blog perusing. I don’t really need to know how to cover everything not nailed down in burlap, and despite what some people think, not everything needs ruffles. I love ruffles as much as the next gal but you do not need ruffles on your lampshade, and you do not need a ruffled camera strap cover. Really…stop with the ruffles already.


I imagine sitting on this couch would be like being trapped in your great Aunt Ida's bosom when she hugs you at your cousin's wedding while wearing that ruffled chiffon shirtthat she's worn to every special occasion since 1968.


"Ida, you're squeezing too tight and I think your Avon perfume is giving me a rash on my face!"

Sorry. I digressed there, but I did warn you in the title that this was full of incoherent rambling.

Monday, November 14, 2011

New Stuff!

I've put a couple new items in the shop. The first is a set of flashcards I made from repurposing an old children's book.

I laminated them for durability. See the listing here.

My other listing isn't brand new, but a bit of a redesign of one of my best selling items. It's my retro inspired gift tag collection.

I've taken out some of the old tags and added in some even snarkier ones.

I've also made the listing so that you can order the full set or a set of 10 and you can customize which tags you want.

My favorite part of doing the photo shoot for these tags was getting to utilize my vintage costume jewelry colleciton.


And this sweet vintage flocked deer I got at the flea market.

Check out the listings in my shop.

Saturday, November 12, 2011

And then I got so excited I needed to change my pants

This past weekend I went to a local flea market. It's usually got the run of the mill flea market vendors; bulk food, t-shirts emblazoned with wolves howling at the moon or running with the wild free wind in their fur, belt buckles, wind chimes made out of hubcaps etc. However, this time there was a new vendor. She had baskets of vintage fabric, old books and....


a 1964 McCall's pattern book.


Yes, a whole section just for Muu Muus!


I have a rather large weakness for vintage ephemera, and my love of sewing and the artistry of patterns makes this a perfect piece for my collection.

I have no idea what I'm going to do with it besides just stare at it and smile and right now, that's enough.

Sunday, October 16, 2011

Shark Treat Bag Tutorial

I've been busy gearing up for Halloween over at my place. Let's just say that it's a good thing that fake spiderwebs and paper cutouts are cheap because I tend to go a little overboard! And speaking of cheap. Check out this adorable shark treat bag that I whipped up out of some inexpensive felt.

Now, if this cute little shark treat bag looks familiar, that's because it was inspired by a product in a well known store catalog. I won't say which catalog, but I will say that it rhymes with Lottery Yarn. Let me just say (so I can't possibly be sued) that this bag was made completely by me, from a pattern I drew up myself which was inspired by a product that I saw, only visually. I do not intend to sell this product, nor the pattern and I'm sharing it freely for people to use solely for personal use.


Okay, now that that's out of the way, let's get started. You'll only need a few supplies:

Felt: I just bought small craft sheets of grey and white felt for the teeth and gums, but you'll need to buy it off the bolt for the body of the shark, 1/2 yard should be sufficient.
Basic sewing supplies: scissors, thread, sewing machine etc.
This pattern: Click here to view
Cut out the pattern pieces. In addition you'll need to cut the following:
2 strips of blue (or main color) for the handle: 16 inches by 1 1/2 inches
2 strips of grey (or gum color): 1 inch by 9 inches, and 1 inch by 12 inches
2 strips of white (or teeth color): 1 1/2 inches by 8 1/2 inches, and 1 1/2 inches by 11 1/2 inches

Now these pictures will seem odd because the bag is already mostly assembled. However, I learned the hard way that it's much easier to add the eyes and gill embellishments before assembly than after. So I would suggest that you do those first.

I simply sewed the black felt eyes on to the main head pieces and then marked chalk lines where I wanted the gills, and stitched a small tight zigzag.

Once this is done, take your two fin pieces and sew them together. Turn them right side out.


Sandwich the fin in between the two head pieces in the spot indicated on the pattern. So you'll have the head pieces right sides together with the fin in between.

Sew the side seams.

Turn the bag right side out and your shark is already taking shape (remember that your piece will already have the eyes and gills on at this stage).

Now, let's work on the teeth. Overlap the white strips with the grey gum strips. They should overlap by about a 1/2 inch. Sew in place.

Cut your teeth shapes. I just freehanded this but you could make a template if you prefer. I rounded the teeth but if you want a more realistic shark you could certainly make them smaller and pointier. Notice how the gum strips are slightly longer. I rounded the edges of the gums with my scissors so they would recede into the mouth.

Before we can attach the teeth to the head, we need to assemble the strap. Lay your two 1.5 inch by 16 inch strips on top of each other and stitch together.

Now place the strap directly on the edge of the shark's top lip, at the seam. Place the longer set of teeth/gums on top of the strap and pin along the upper lip. Sew in place.

The bottom teeth are a little trickier because you'll need to bring the strap over and around underneath the bottom teeth. See picture for a better explanation. Be careful not to twist the strap when pinning it in.

Once you have the strap and teeth in place it's a good idea to top stitch along the top and bottom lip of your shark to keep your teeth from wanting the fold back on themselves. I topstitched with a contrasting thread so you could see it, but you'll want to use a matching thread color.

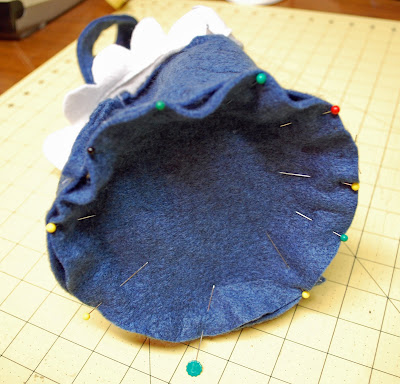
Now all that's left is to turn your bag right sides in, sew on the bottom and then turn right side out.

Then you're done! Enjoy.


Monday, September 12, 2011

A Halloween Graveyard Terrarium, or, Are two spinal columns considered overkill?

I love terrariums, I love Halloween, and I love miniature dioramas. Never have all three of these things come together so well, as in this graveyard mini terrarium display.

I wish I had come up with the concept myself, but I got the idea from silvia-chenault.blogspot.com. I've included the link here, but as of the time of this post, her blog has been removed. However, I must give credit where credit is due for her great idea.

Want to make one of your own? You just need a few basic supplies:

-Floral Moss
-Black decorative sand (or if you're into realism you could just use dirt)
-Skeletons
-A container (I used a clear plastic display case I found on sale at a craft store but any clear container would work)
-Materials for headstones (I used cardboard and paint)
-twigs and black spray paint (optional)


First, prepare your skeletons by hacking them to peices with a pair of scissors.

Then cut out some headstone shapes. I just used some heavy cardboard pieces that I had lying around, but you could use small scraps of wood or whatever you have on hand.


Paint your headstones to look old and moss covered. I just used regular acrylic craft paint.


Then assemble your terrarium/diorama/morbid graveyard scene. Pour black sand in the bottom to simulate the dirt, add in your various skeleton pieces, your headstones and cover with moss.


I felt I needed some height in mine so I gathered some twigs out of the backyard and painted them black really quick with a few quick squirts of spray paint, then I stuck them in the sand to look like an old dead tree.

I played around a lot with placement. It's a fine line between, "artistic decomposing human remains" and "gory gratuity". One extra ribcage could mean the difference between art and excess.

I'm happy with it for now but plan on perhaps adding a rickety wrought iron graveyard fence by cutting one out of black cardstock and putting it up against the back of the container. Maybe I'll add some faux cobwebs in the tree or a shifty eyed little raven.


I had toyed with the idea of making it an actual live terrarium, but didn't want to go to the trouble of finding headstone options that would withstand the moisture, but considering I usually kill live terrariums anyway, it probably would have been a great effect!


I hope this inspires you to create your own mini vessel of rot and senseless Halloween gore.

Thursday, August 25, 2011

Oreo afghans, and setting your phasers to stun - the best of the Iowa State Fair

There are a few things in this world that provide me with unadulterated joy. Most of them involve whipped cream or that stuff that’s inside a Little Debbie oatmeal creme pie, and then there’s the Iowa State Fair.

I love the fair, I adore it. And it’s not just for the food, though that is a big part of it. It’s for the atmosphere, the free entertainment, the people watching AND the crafts.

I always find things that amaze and amuse me. This year was no different. Allow me to take you on a little virtual tour of the crafty highlights.

First off, let me say that I truly believe quilting is an art form. I’m a little bit of a quilter myself, not a great one, but enough of one to know the time, money, dedication and true skill it takes to create a beautiful quilt.

This one below has all the makings of a winner. It makes you really want to wrap it around yourself and snuggle up close.

I was quite shocked that it didn't win a ribbon. I mean look at the craftsmanship; the intricate detail...

I don't know about you, but I'm feeling festive just looking at it.

The best part though is that it was made by a man, and quite frankly I was happy for him to have his work displayed where so many could see it.


After the quilts I moved on to the yarn arts. What inspiration I found there! One of these two items will be my next winter hat. I just can't decide which one.


or
I'm leaning toward the fish because I feel it would go with just about anything. I'd be tempted to pair the viking hat only with outfits that incorporate some type of breast plate, and well that's just not always practical.

Now this next piece is truly unique. Take it in folks:

Yep, it's an oreo cook afghan. I can't really say anything more about it. I'm that speechless.


Now aside from the fabric arts I'm always blown away by the talent displayed in the fine arts buildings at the fair. This next piece shows true artistry and skill, and yet I feel like the choice of canvas was well... a little crappy.


I don't really know what disturbs me more, the tongue? the goatee? or maybe it's just the fact that someone has painted a man with a goatee and his tongue sticking out on the lid of a toilet seat...yep, I think that's it.

I also adore looking at the miniature houses and rooms. The time, effort and dedication put into these small replicas always make me smile. This one especially caught my eye. It's fabulous in and of itself, and then as I looked closer I determined that the man behind the counter was none other than Dr. McCoy from Star Trek!

My husband tried to convince me that it was Spock, but that's just ridiculous. It's clearly Bones.


I've been saying that in my head all week and imagining him setting his phaser to stun, just in case he catches someone trying to sneak a strawberry.