Sunday, October 16, 2011

Shark Treat Bag Tutorial

I've been busy gearing up for Halloween over at my place. Let's just say that it's a good thing that fake spiderwebs and paper cutouts are cheap because I tend to go a little overboard! And speaking of cheap. Check out this adorable shark treat bag that I whipped up out of some inexpensive felt.

Now, if this cute little shark treat bag looks familiar, that's because it was inspired by a product in a well known store catalog. I won't say which catalog, but I will say that it rhymes with Lottery Yarn. Let me just say (so I can't possibly be sued) that this bag was made completely by me, from a pattern I drew up myself which was inspired by a product that I saw, only visually. I do not intend to sell this product, nor the pattern and I'm sharing it freely for people to use solely for personal use.


Okay, now that that's out of the way, let's get started. You'll only need a few supplies:

Felt: I just bought small craft sheets of grey and white felt for the teeth and gums, but you'll need to buy it off the bolt for the body of the shark, 1/2 yard should be sufficient.
Basic sewing supplies: scissors, thread, sewing machine etc.
This pattern: Click here to view
Cut out the pattern pieces. In addition you'll need to cut the following:
2 strips of blue (or main color) for the handle: 16 inches by 1 1/2 inches
2 strips of grey (or gum color): 1 inch by 9 inches, and 1 inch by 12 inches
2 strips of white (or teeth color): 1 1/2 inches by 8 1/2 inches, and 1 1/2 inches by 11 1/2 inches

Now these pictures will seem odd because the bag is already mostly assembled. However, I learned the hard way that it's much easier to add the eyes and gill embellishments before assembly than after. So I would suggest that you do those first.

I simply sewed the black felt eyes on to the main head pieces and then marked chalk lines where I wanted the gills, and stitched a small tight zigzag.

Once this is done, take your two fin pieces and sew them together. Turn them right side out.


Sandwich the fin in between the two head pieces in the spot indicated on the pattern. So you'll have the head pieces right sides together with the fin in between.

Sew the side seams.

Turn the bag right side out and your shark is already taking shape (remember that your piece will already have the eyes and gills on at this stage).

Now, let's work on the teeth. Overlap the white strips with the grey gum strips. They should overlap by about a 1/2 inch. Sew in place.

Cut your teeth shapes. I just freehanded this but you could make a template if you prefer. I rounded the teeth but if you want a more realistic shark you could certainly make them smaller and pointier. Notice how the gum strips are slightly longer. I rounded the edges of the gums with my scissors so they would recede into the mouth.

Before we can attach the teeth to the head, we need to assemble the strap. Lay your two 1.5 inch by 16 inch strips on top of each other and stitch together.

Now place the strap directly on the edge of the shark's top lip, at the seam. Place the longer set of teeth/gums on top of the strap and pin along the upper lip. Sew in place.

The bottom teeth are a little trickier because you'll need to bring the strap over and around underneath the bottom teeth. See picture for a better explanation. Be careful not to twist the strap when pinning it in.

Once you have the strap and teeth in place it's a good idea to top stitch along the top and bottom lip of your shark to keep your teeth from wanting the fold back on themselves. I topstitched with a contrasting thread so you could see it, but you'll want to use a matching thread color.

Now all that's left is to turn your bag right sides in, sew on the bottom and then turn right side out.

Then you're done! Enjoy.


Monday, September 12, 2011

A Halloween Graveyard Terrarium, or, Are two spinal columns considered overkill?

I love terrariums, I love Halloween, and I love miniature dioramas. Never have all three of these things come together so well, as in this graveyard mini terrarium display.

I wish I had come up with the concept myself, but I got the idea from silvia-chenault.blogspot.com. I've included the link here, but as of the time of this post, her blog has been removed. However, I must give credit where credit is due for her great idea.

Want to make one of your own? You just need a few basic supplies:

-Floral Moss
-Black decorative sand (or if you're into realism you could just use dirt)
-Skeletons
-A container (I used a clear plastic display case I found on sale at a craft store but any clear container would work)
-Materials for headstones (I used cardboard and paint)
-twigs and black spray paint (optional)


First, prepare your skeletons by hacking them to peices with a pair of scissors.

Then cut out some headstone shapes. I just used some heavy cardboard pieces that I had lying around, but you could use small scraps of wood or whatever you have on hand.


Paint your headstones to look old and moss covered. I just used regular acrylic craft paint.


Then assemble your terrarium/diorama/morbid graveyard scene. Pour black sand in the bottom to simulate the dirt, add in your various skeleton pieces, your headstones and cover with moss.


I felt I needed some height in mine so I gathered some twigs out of the backyard and painted them black really quick with a few quick squirts of spray paint, then I stuck them in the sand to look like an old dead tree.

I played around a lot with placement. It's a fine line between, "artistic decomposing human remains" and "gory gratuity". One extra ribcage could mean the difference between art and excess.

I'm happy with it for now but plan on perhaps adding a rickety wrought iron graveyard fence by cutting one out of black cardstock and putting it up against the back of the container. Maybe I'll add some faux cobwebs in the tree or a shifty eyed little raven.


I had toyed with the idea of making it an actual live terrarium, but didn't want to go to the trouble of finding headstone options that would withstand the moisture, but considering I usually kill live terrariums anyway, it probably would have been a great effect!


I hope this inspires you to create your own mini vessel of rot and senseless Halloween gore.

Thursday, August 25, 2011

Oreo afghans, and setting your phasers to stun - the best of the Iowa State Fair

There are a few things in this world that provide me with unadulterated joy. Most of them involve whipped cream or that stuff that’s inside a Little Debbie oatmeal creme pie, and then there’s the Iowa State Fair.

I love the fair, I adore it. And it’s not just for the food, though that is a big part of it. It’s for the atmosphere, the free entertainment, the people watching AND the crafts.

I always find things that amaze and amuse me. This year was no different. Allow me to take you on a little virtual tour of the crafty highlights.

First off, let me say that I truly believe quilting is an art form. I’m a little bit of a quilter myself, not a great one, but enough of one to know the time, money, dedication and true skill it takes to create a beautiful quilt.

This one below has all the makings of a winner. It makes you really want to wrap it around yourself and snuggle up close.

I was quite shocked that it didn't win a ribbon. I mean look at the craftsmanship; the intricate detail...

I don't know about you, but I'm feeling festive just looking at it.

The best part though is that it was made by a man, and quite frankly I was happy for him to have his work displayed where so many could see it.


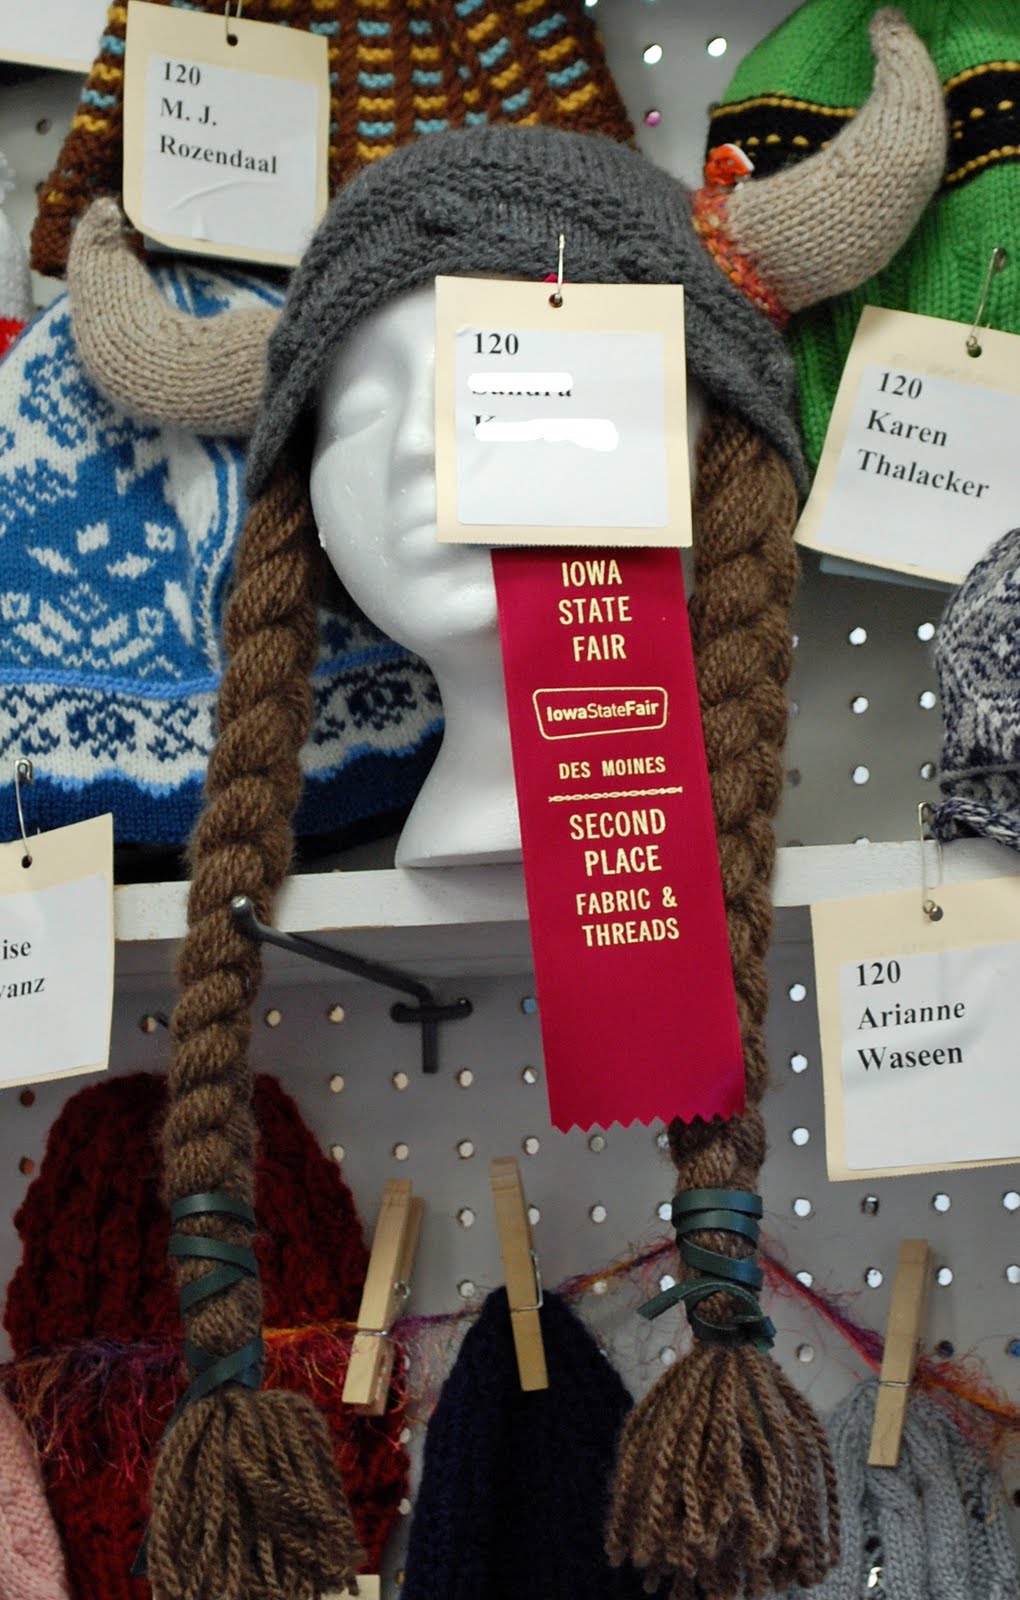
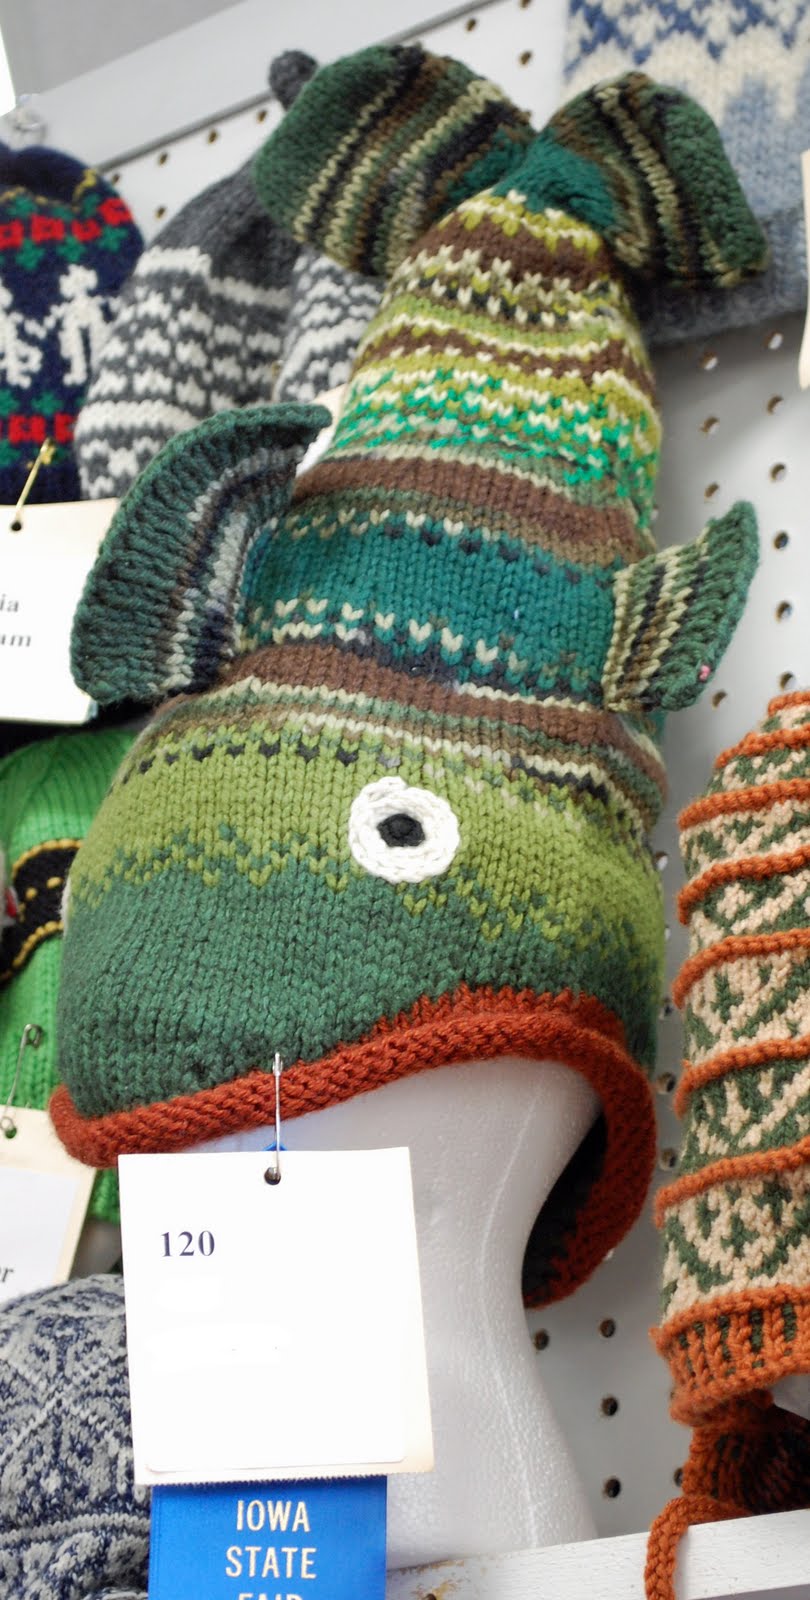
After the quilts I moved on to the yarn arts. What inspiration I found there! One of these two items will be my next winter hat. I just can't decide which one.


or
I'm leaning toward the fish because I feel it would go with just about anything. I'd be tempted to pair the viking hat only with outfits that incorporate some type of breast plate, and well that's just not always practical.

Now this next piece is truly unique. Take it in folks:

Yep, it's an oreo cook afghan. I can't really say anything more about it. I'm that speechless.


Now aside from the fabric arts I'm always blown away by the talent displayed in the fine arts buildings at the fair. This next piece shows true artistry and skill, and yet I feel like the choice of canvas was well... a little crappy.


I don't really know what disturbs me more, the tongue? the goatee? or maybe it's just the fact that someone has painted a man with a goatee and his tongue sticking out on the lid of a toilet seat...yep, I think that's it.

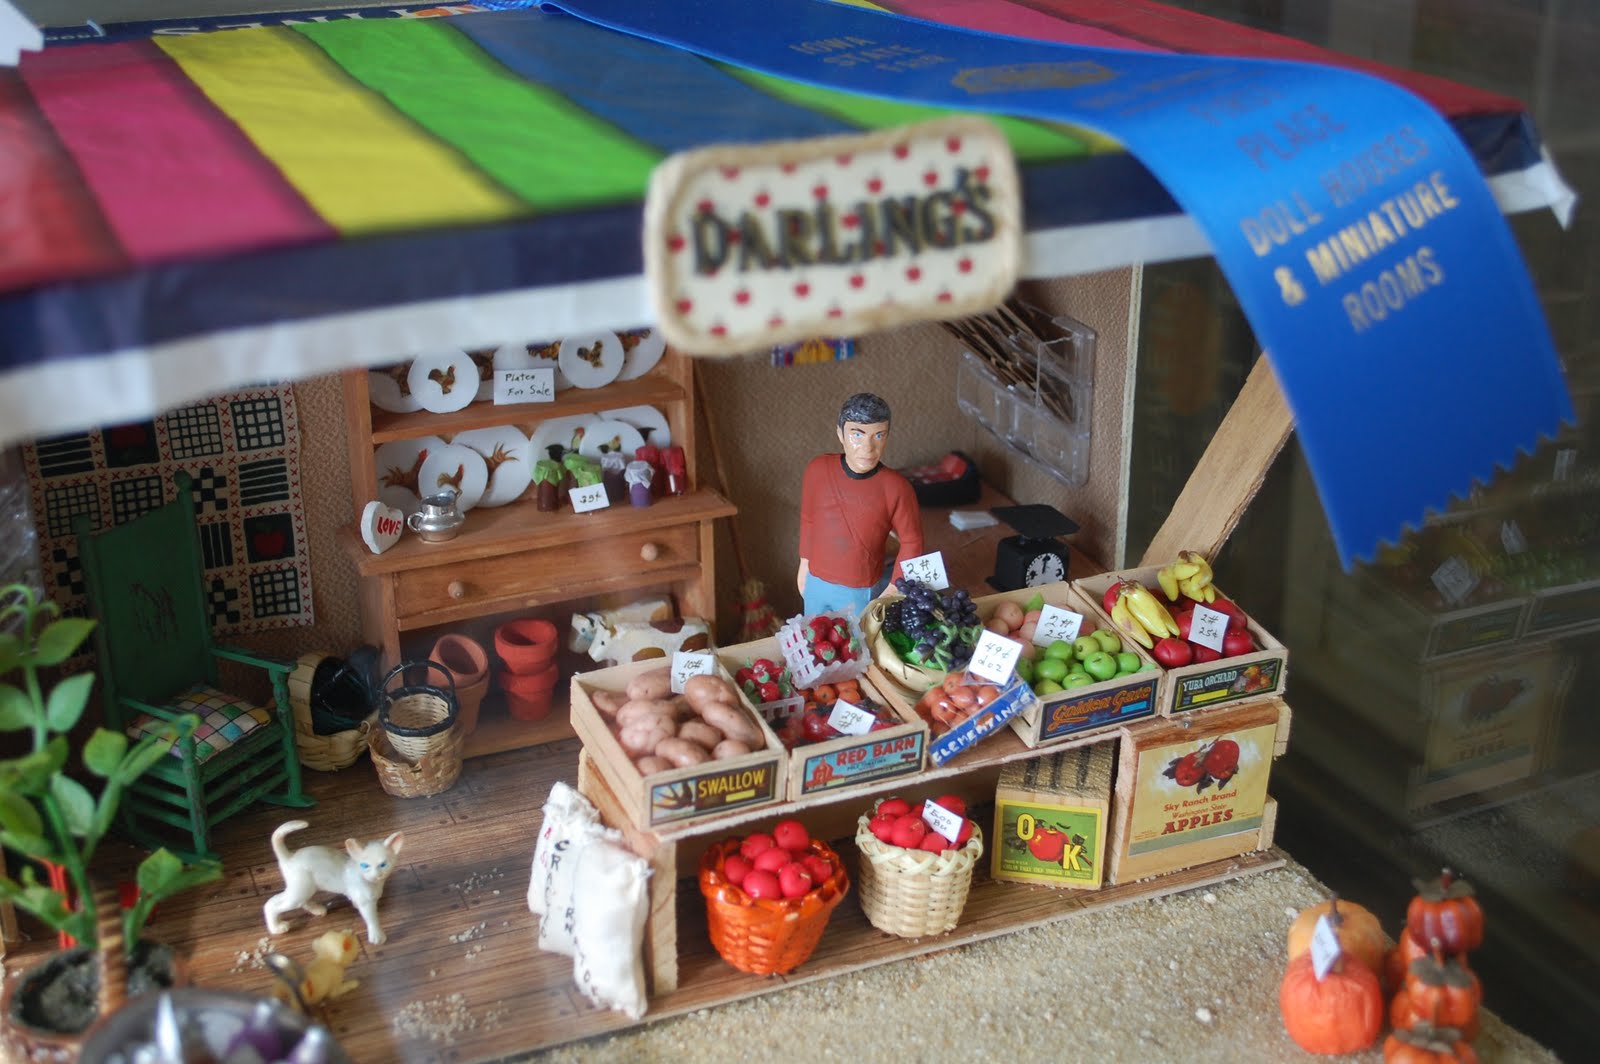
I also adore looking at the miniature houses and rooms. The time, effort and dedication put into these small replicas always make me smile. This one especially caught my eye. It's fabulous in and of itself, and then as I looked closer I determined that the man behind the counter was none other than Dr. McCoy from Star Trek!

My husband tried to convince me that it was Spock, but that's just ridiculous. It's clearly Bones.


I've been saying that in my head all week and imagining him setting his phaser to stun, just in case he catches someone trying to sneak a strawberry.

Tuesday, July 12, 2011

The most wonderful time of the year

I love stuff - just about any kind of stuff really, and the stranger and the cheaper it is the better. That's why I love the summer because I have endless opportunities to find all sorts of treasures at garage sales.

Check out the finds I reeled in with just one morning's worth of work.

First off I found a ton of fabulous vintage children's books. I love the illustrations and I'm hoping at some point to repurpose them into other fabulous things.
Believe it or not, I got this entire set below for only $2. I saw it from across some gal's yard and nearly knocked over several shoppers just to get it before anyone else could snatch it up. It's one of the most fabulously ugly things I've ever seen.

I've determined that this is my new thing, "fabulously ugly" because anyone can have something aesthetically pleasing in their house, but where's the fun in that? You want some cute, sleek, ultra modern knick knack? Go to Ikea and buy something you can't pronounce. Maybe something with a vowel with those two little dots on top of it.

Me, I prefer this hideous ceramic coffee set made to look like stacked green apples and daisies. It's what you call a "conversation piece".

And speaking of conversation pieces, this was my best find yet: a holographic pictue of Jesus knocking on someone's front door.
I can't believe he only cost me a buck, and my husband can't believe that I actually hung him up in the hallway;

Me: "Look dear, every time you walk by him it looks like he's actually knocking!!"

My husband: *eye roll*

Almost every day I think of new things he might say to whoever opens that door and I imagine that will entertain me for years to come, and perhaps be added to the list of reasons why I'll never know what heaven looks like. I'm betting that old J.C. has a pretty good sense of humor though so I'm willing to risk it.

I can't wait until next Saturday!

Thursday, June 23, 2011

Thought Provoking Thursday – Hobby Lobby

For this installment of Thought Provoking Thursday I’m going to give you a play by play of some of the random thoughts that knocked around in my brain the last time I went to Hobby Lobby – the land of vintage pricing guns and understocked shelves.

Upon entering the store and seeing an employee stocking shelves with fake plastic pumpkins and fall leaf garlands:
“Whoa, hold on. It’s June right? Have I just entered some sort of time warp or maybe this is an alternate universe? If so am I skinny in this alternate reality?” looks down at body, “Damn, guess not.”

While trying to navigate the main aisle which is crammed full of square display pedestals overloaded with breakable merchandise that is teetering on the edges.
“Dear God, don’t let my children knock over any of those awful ceramic pitchers in the shape of farm animals because then I’d have to run out of this store and never come back. I’d rather boycott this place than to have to pay even a dime towards a rabid looking pig that you can pour lemonade out of – especially if it’s broken.”

After being lured into a clearance aisle in the hopes of unbelievable bargains:
“Why is this end table missing the drawer knob? Look at that huge scratch on the side. I bet if I picked it up that entire leg would fall off. Good lord they’re still asking $40 for this thing. Do people buy this cheap foreign crap at full price?”

After locating the item I came to purchase and finding they only have one of them in stock and I need 3:
“@#$%#$^#$%@@&^*$^&!!! Why do they only carry one of everything? $$%@$^##&%@$%@$%!”

While standing for 30 minutes at the only open checkout lane watching the poor employee search for price stickers, manually input each price and then scour the printed ad in front of her to see if it’s on sale:
“This is why this store is closed on Sunday. The employees need time to go to church and pray that the owners will at some point enter the 21st century.”

Now don’t get me wrong. I adore Hobby Lobby. Okay, well maybe “adore” is an exaggeration. I shop there because they’re the best location for certain craft supplies in my area (that is, if you only need one of each item). They usually have really good sales too…but that’s where my adoration ends and my frustration begins.

Tell me your thoughts about Hobby Lobby, or about your favorite or least favorite craft store.

Tuesday, June 7, 2011

Super Hero Photo Backdrop

My best friend's little boy had a birthday last month. He's into all things super hero and so naturally his paty was super hero themed. The invitations encouraged all of the guests to arrive in costume and we also supplied some generic masks and capes too and we wanted to have some back drops available for the kids to take pictures in front of with their costumes.

I thought I'd share with you the quick and east photo backdrop idea we came up with in case you're planning a super hero party of your own, or if you like masks and spandex yourself - heyI don't judge!

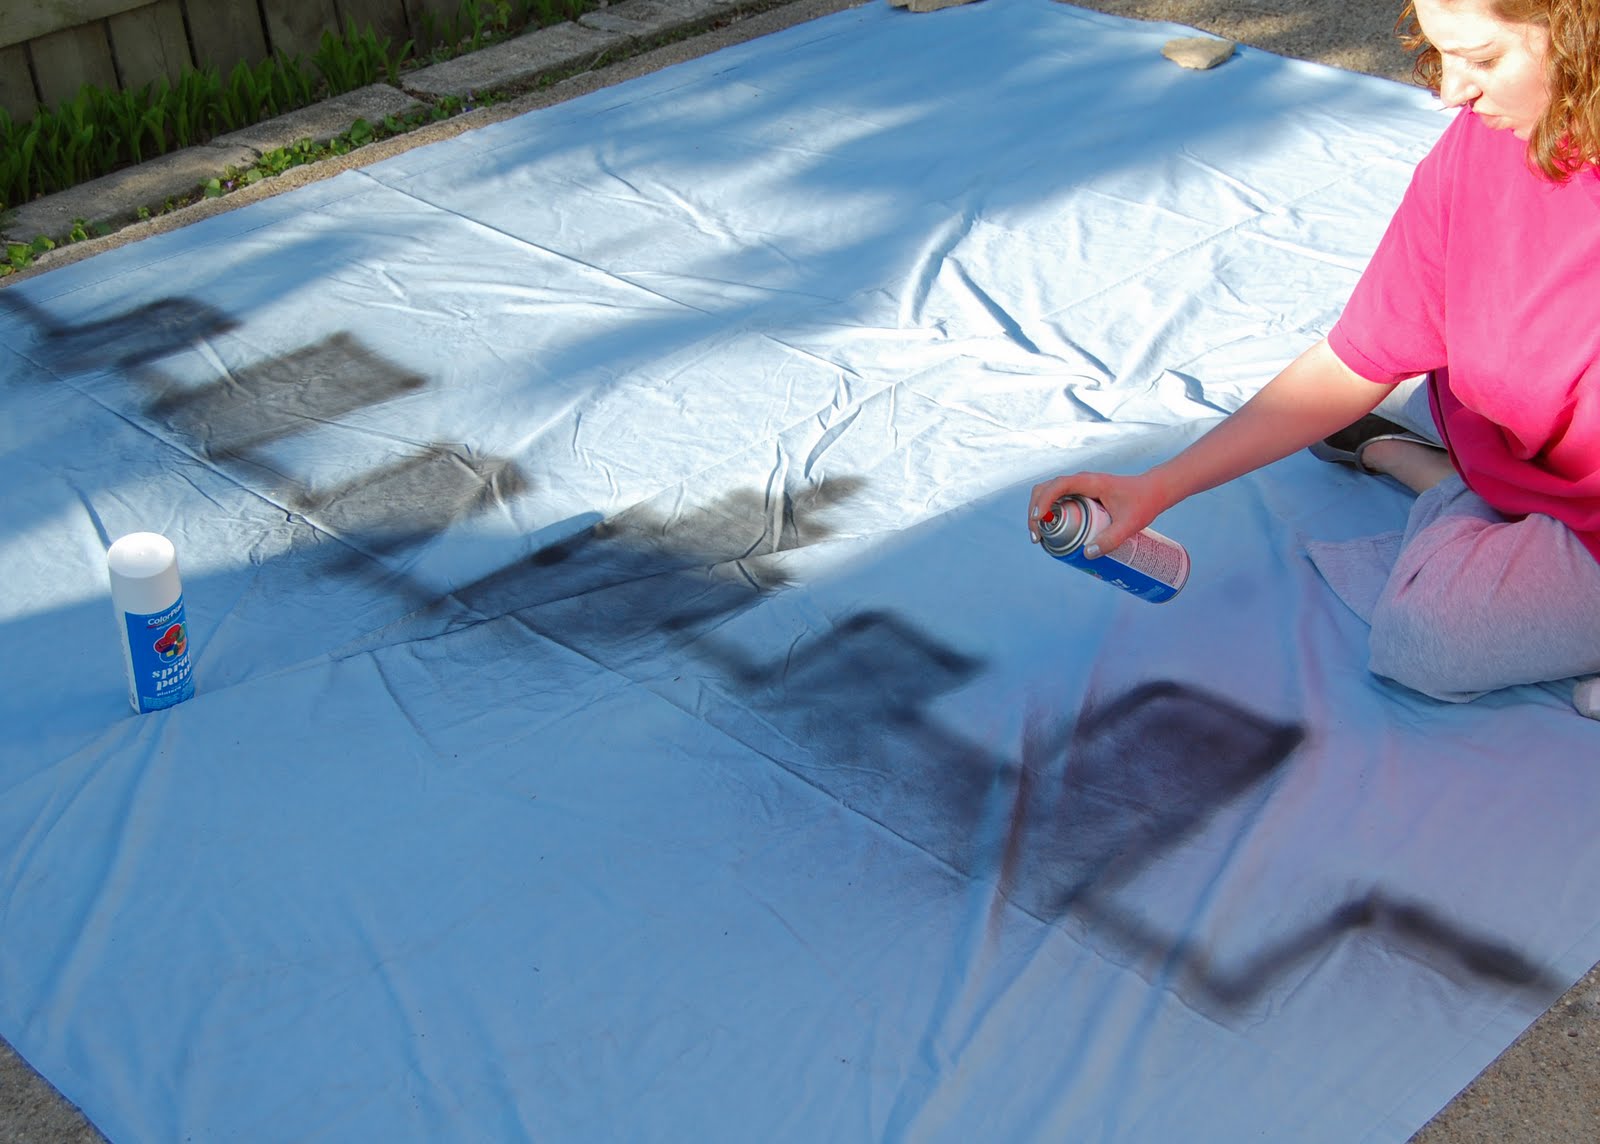
We started off with a king size blue sheet we got from our local thrift store for $2. Just lay it on a flat surface (the driveway works well) grab some black spray paint and free hand a city skyline. Then fill in the buildings with the black spray paint.


Get a sponge and cut it into rectangle shapes, dip it in white acrylic craft paint and dab on the windows. We used these sponges to outline the cloud shapes as well. (I actually didn't have a sponge - this is some leftover craft foam from a project, but it worked just as well)


And in no time at all you've got a city skyline for your little superheroes to pose in front of.
Here's my little guy testing it out before the party.


We had a white sheet too and a plethora of cheap spray paint so we free handed a starburst/tie dyed effect.


We had to explain what a Charlie's Angels pose was to my son - kid's these days! You'd think I would have taught him better.

Both backdrops were a great success at the party.

Friday, May 13, 2011

Holy Crapola!

UPDATE: the winners have been chosen! Drumroll please............

Congratulations Jaclyn (anyone who would want 107 oreos is a friend of mine!) and BettyCrockerAss! (because I've got a lot of days I'd like to do over too)

I'll be contacting you to find out where to ship your pincushions to.

Thanks to everyone who commented. I loved them all but unfortunately I could only pick 2.

.............................................................................................
A friend of mine pointed out the other day that I currently have 107 followers on this blog.

I’ve been flirting with the 100 mark for quite some time but to finally achieve it, and actually surpass it – well it feels like an accomplishment, even though all I do is randomly post some drivel about bears crapping in the woods.

107! Thanks everyone. It honestly means a lot to me that 107 of you find this place useful enough and entertaining enough to add it to what I’m sure is a long list of other internet stops in your busy lives. I mean Farmville isn’t going to play itself, am I right?

So to sufficiently express my gratitude I’m giving away two of these lovely funky pincushions.


All you have to do to win is tell me in the comments what you’d like to have 107 of. Consider this your thought provoking Thursday! (hey, I know it's Friday but Blogger was unavailable yesterday when I tried to post so cut me some slack)

Everybody wants 107 of something, right?

107 life sized Smurf figurines – sign me up!

107 vacation days from work - oh yeah!

107 freckles – what? I’ve got a lot more than that right now, 107 would be a reduction!

You get the idea. Now to be fair I should probably just choose a winner at random but I’ve never really been accused of being fair. So I’m just going to pick the two that make me smile the biggest and they will be the winners.

Be sure to leave some way for me to get in contact with you.