Showing posts with label tutorial. Show all posts

Wednesday, January 2, 2013

DIY jewelry displays

The majority of my recent crafty DIY projects have centered around spicing up the bedroom . . . .no, I haven't been knitting wool bustiers (itchy).  I mean spicing it up interior design wise. 

I determined that I wanted my jewelry on display instead of hidden away in my jewelry case. I find that when it's visible it gets worn a lot often, plus it seems a shame to keep things that I find so attractive and sentimental inside a drawer.

I started by displaying my necklaces.  This was as simple as screwing some cup hooks into the bottom of an already existing shelf.

 
Then I took an old photo frame, replaced the backing with a piece of foam core, wrapped it with a layer of quilt batting and white fabric and made my own mini pin board for my brooches.
 

Then it was on to my favorite things - my rings.  I have a recent obsession with what my friends like to call "big ass rings" and I needed somewhere to display them.  I solved that problem with some frames and felt:


Here's a quick how to in case anyone is interested.

I started with some fabulous IKEA frames - of course you can use whatever frames you have available.


I had to remove their backs and the glass (which was actually plastic).  Then I got out my stash of felt and started rolling up some tampons.  Or at least that's what they started looking like to me.  I had to do some experimentation to determine how much felt was needed for each roll.  My white felt was quite thick (super absorbency) and I only needed about 5 inches in length.  The width was about 1 inch longer than the width of my frame opening.  

 I used a line of hot glue to hold my roll together.
 
When I had enough I hot glued them to a piece of cardboard sligtly larger than my frame opening.  Be sure to hot glue them securely and as tight together as possible.
 
 This is when things got really high tech! I couldn't use the original back of my frame as it wouldn't accomodate the thickness of my felt, so I used the handyman's greatest tool - duct tape.  It looks classy though because I got the white duct tape to match my frame!!

 
It worked quite well.  I used some command strips to hold this one to the wall and it's been 4 months and it hasn't fallen apart yet so I'm calling that a success!

I used a nice burnt orange felt on my other frame. It wasn't as thick as the white so I ended up rolling up about 7 inches instead of 5, but aside from that everything else was the same.


 I wanted this one to stand on my shelf so I used my duct tape and some really sturdy cardboard to create a stand on the back.

 
Hope you can use some of these techniques to create your own jewelry displays.

Thursday, November 8, 2012

Pinthetic? Bookends as floating bookshelves

I recently switched bedrooms with my children and so I've been spending some time redecorating it with Pinterest inspired projects.  One of these projects was this floating book, bookshelf idea.

Here's the original pin:


Now the original pin didn't have any instructions, but it seemed simple enough.  Get a metal bookend, screw it to the wall, add books and Bob's your uncle you're rocking out some sweet floating bookshelves right?  Well not quite.  But I got it accomplished:
 
 When I started planning on actually putting it together I asked myself, "How the hell is the bottom cover of that book attached to the bookend Also, as a sad consequence of the current state of our economy, the local Bookends R Us store went out of business so I couldn't even find a bookend that would work for this project.

I'm sure maybe I could have found something online but I have no patience so I just went to my local hardware store and found the thinnest metal brace I could find.  This was from the decking section and is intended to secure the posts to the frame or something along those lines.  It was around $4.

 
 I also got some small screws (about 1/2 inch long) and a lovely hard cover book from the dollar store. I had come up with several scenarios as to how to possibly attach the book to the bracket so that it wouldn't be permanent, but they all just seemed too complex.  I also contemplated just using some double sided tape or other semi-removable adhesive so that the bottom book could be removed, but since I knew I'd have other books stacked on top of it, I really wanted that bottom book securely fastened to the brace. 
 So if you attempt this project just bite the bullet and find some cheap book you don't care about, but like the cover of.  I removed the dust jacket, marked the center of the cover and just screwed the bracket directly into the book.  My screws went through the cover and a little bit into the pages to make it nice and secure. 
 Now all you need to do is slip the dust jacket back on to your book.  Mark and cut out a section from the back flap and then pry up the edges of the pages and slide it back in. This covers up your bracket and screws.
Then it's just a matter of screwing your bracket to the wall, adding your books and topping it with a gnome or two.  It's a requirement people, everything is better with gnomes!

Not bad eh?

Sunday, October 16, 2011

Shark Treat Bag Tutorial

I've been busy gearing up for Halloween over at my place. Let's just say that it's a good thing that fake spiderwebs and paper cutouts are cheap because I tend to go a little overboard! And speaking of cheap. Check out this adorable shark treat bag that I whipped up out of some inexpensive felt.

Now, if this cute little shark treat bag looks familiar, that's because it was inspired by a product in a well known store catalog. I won't say which catalog, but I will say that it rhymes with Lottery Yarn. Let me just say (so I can't possibly be sued) that this bag was made completely by me, from a pattern I drew up myself which was inspired by a product that I saw, only visually. I do not intend to sell this product, nor the pattern and I'm sharing it freely for people to use solely for personal use.


Okay, now that that's out of the way, let's get started. You'll only need a few supplies:

Felt: I just bought small craft sheets of grey and white felt for the teeth and gums, but you'll need to buy it off the bolt for the body of the shark, 1/2 yard should be sufficient.
Basic sewing supplies: scissors, thread, sewing machine etc.
This pattern: Click here to view
Cut out the pattern pieces. In addition you'll need to cut the following:
2 strips of blue (or main color) for the handle: 16 inches by 1 1/2 inches
2 strips of grey (or gum color): 1 inch by 9 inches, and 1 inch by 12 inches
2 strips of white (or teeth color): 1 1/2 inches by 8 1/2 inches, and 1 1/2 inches by 11 1/2 inches

Now these pictures will seem odd because the bag is already mostly assembled. However, I learned the hard way that it's much easier to add the eyes and gill embellishments before assembly than after. So I would suggest that you do those first.

I simply sewed the black felt eyes on to the main head pieces and then marked chalk lines where I wanted the gills, and stitched a small tight zigzag.

Once this is done, take your two fin pieces and sew them together. Turn them right side out.


Sandwich the fin in between the two head pieces in the spot indicated on the pattern. So you'll have the head pieces right sides together with the fin in between.

Sew the side seams.

Turn the bag right side out and your shark is already taking shape (remember that your piece will already have the eyes and gills on at this stage).

Now, let's work on the teeth. Overlap the white strips with the grey gum strips. They should overlap by about a 1/2 inch. Sew in place.

Cut your teeth shapes. I just freehanded this but you could make a template if you prefer. I rounded the teeth but if you want a more realistic shark you could certainly make them smaller and pointier. Notice how the gum strips are slightly longer. I rounded the edges of the gums with my scissors so they would recede into the mouth.

Before we can attach the teeth to the head, we need to assemble the strap. Lay your two 1.5 inch by 16 inch strips on top of each other and stitch together.

Now place the strap directly on the edge of the shark's top lip, at the seam. Place the longer set of teeth/gums on top of the strap and pin along the upper lip. Sew in place.

The bottom teeth are a little trickier because you'll need to bring the strap over and around underneath the bottom teeth. See picture for a better explanation. Be careful not to twist the strap when pinning it in.

Once you have the strap and teeth in place it's a good idea to top stitch along the top and bottom lip of your shark to keep your teeth from wanting the fold back on themselves. I topstitched with a contrasting thread so you could see it, but you'll want to use a matching thread color.

Now all that's left is to turn your bag right sides in, sew on the bottom and then turn right side out.

Then you're done! Enjoy.


Monday, September 12, 2011

A Halloween Graveyard Terrarium, or, Are two spinal columns considered overkill?

I love terrariums, I love Halloween, and I love miniature dioramas. Never have all three of these things come together so well, as in this graveyard mini terrarium display.

I wish I had come up with the concept myself, but I got the idea from silvia-chenault.blogspot.com. I've included the link here, but as of the time of this post, her blog has been removed. However, I must give credit where credit is due for her great idea.

Want to make one of your own? You just need a few basic supplies:

-Floral Moss
-Black decorative sand (or if you're into realism you could just use dirt)
-Skeletons
-A container (I used a clear plastic display case I found on sale at a craft store but any clear container would work)
-Materials for headstones (I used cardboard and paint)
-twigs and black spray paint (optional)


First, prepare your skeletons by hacking them to peices with a pair of scissors.

Then cut out some headstone shapes. I just used some heavy cardboard pieces that I had lying around, but you could use small scraps of wood or whatever you have on hand.


Paint your headstones to look old and moss covered. I just used regular acrylic craft paint.


Then assemble your terrarium/diorama/morbid graveyard scene. Pour black sand in the bottom to simulate the dirt, add in your various skeleton pieces, your headstones and cover with moss.


I felt I needed some height in mine so I gathered some twigs out of the backyard and painted them black really quick with a few quick squirts of spray paint, then I stuck them in the sand to look like an old dead tree.

I played around a lot with placement. It's a fine line between, "artistic decomposing human remains" and "gory gratuity". One extra ribcage could mean the difference between art and excess.

I'm happy with it for now but plan on perhaps adding a rickety wrought iron graveyard fence by cutting one out of black cardstock and putting it up against the back of the container. Maybe I'll add some faux cobwebs in the tree or a shifty eyed little raven.


I had toyed with the idea of making it an actual live terrarium, but didn't want to go to the trouble of finding headstone options that would withstand the moisture, but considering I usually kill live terrariums anyway, it probably would have been a great effect!


I hope this inspires you to create your own mini vessel of rot and senseless Halloween gore.

Tuesday, June 7, 2011

Super Hero Photo Backdrop

My best friend's little boy had a birthday last month. He's into all things super hero and so naturally his paty was super hero themed. The invitations encouraged all of the guests to arrive in costume and we also supplied some generic masks and capes too and we wanted to have some back drops available for the kids to take pictures in front of with their costumes.

I thought I'd share with you the quick and east photo backdrop idea we came up with in case you're planning a super hero party of your own, or if you like masks and spandex yourself - heyI don't judge!

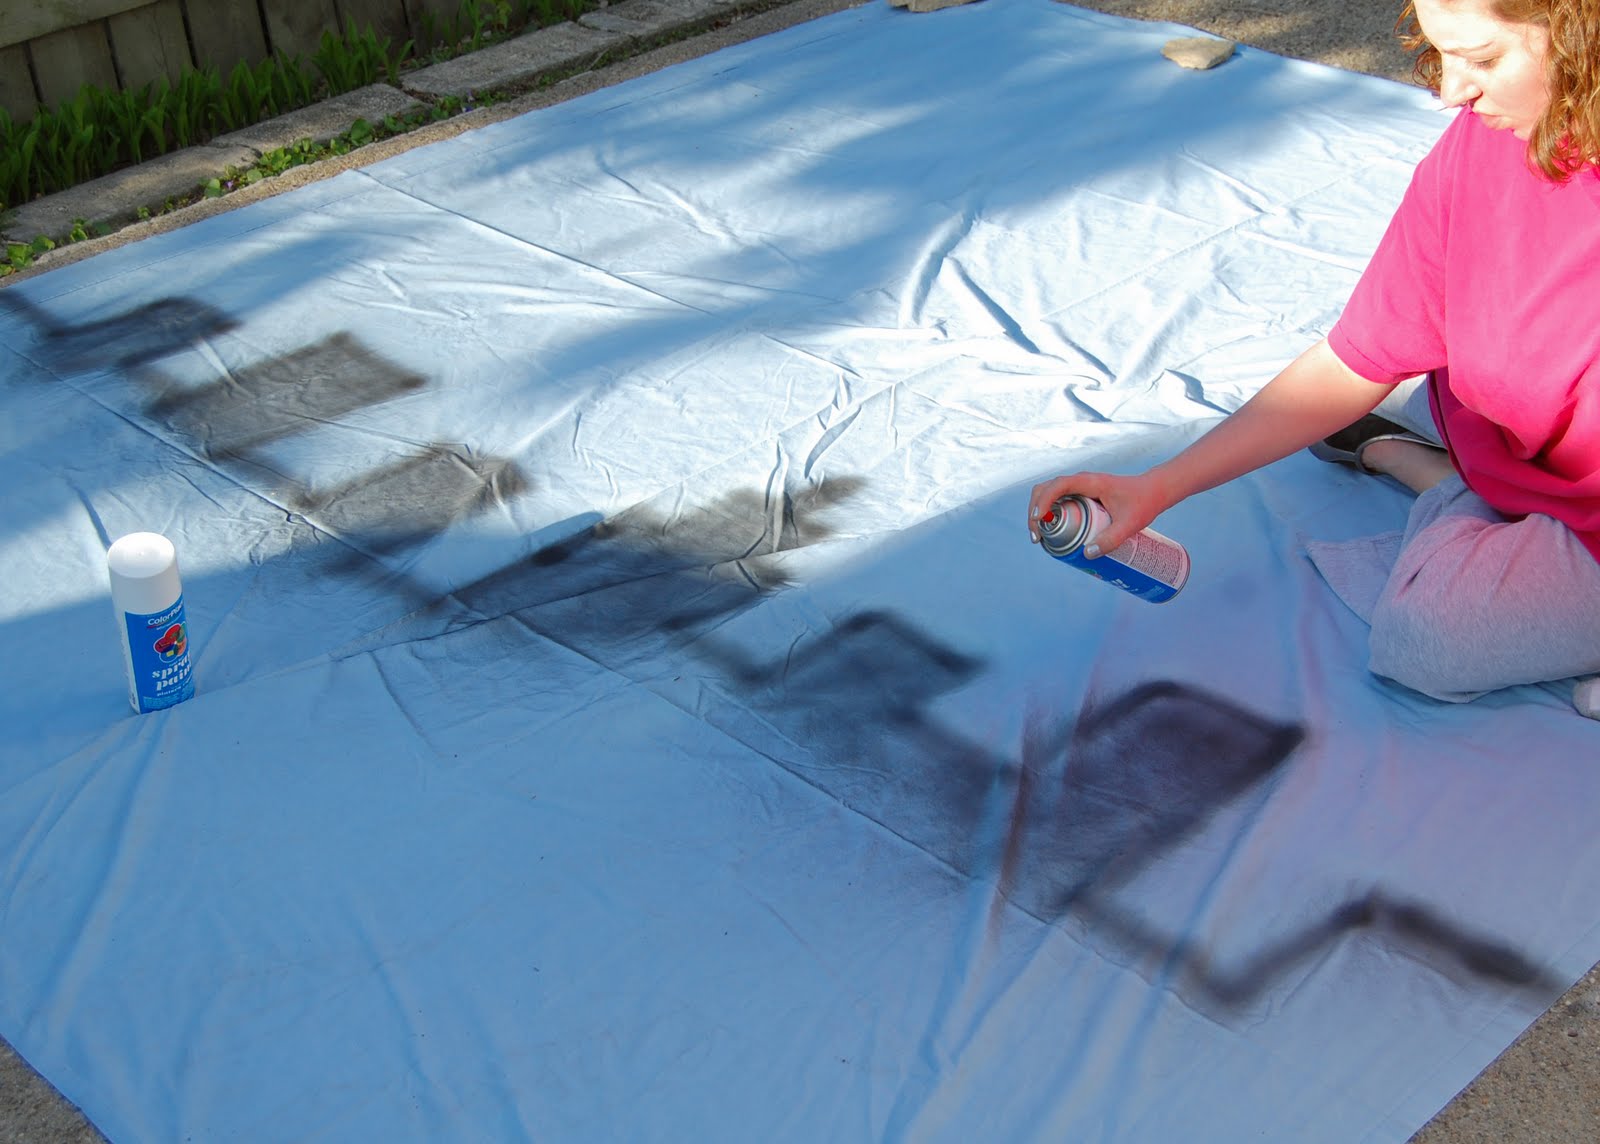
We started off with a king size blue sheet we got from our local thrift store for $2. Just lay it on a flat surface (the driveway works well) grab some black spray paint and free hand a city skyline. Then fill in the buildings with the black spray paint.


Get a sponge and cut it into rectangle shapes, dip it in white acrylic craft paint and dab on the windows. We used these sponges to outline the cloud shapes as well. (I actually didn't have a sponge - this is some leftover craft foam from a project, but it worked just as well)


And in no time at all you've got a city skyline for your little superheroes to pose in front of.
Here's my little guy testing it out before the party.


We had a white sheet too and a plethora of cheap spray paint so we free handed a starburst/tie dyed effect.


We had to explain what a Charlie's Angels pose was to my son - kid's these days! You'd think I would have taught him better.

Both backdrops were a great success at the party.