Tuesday, March 1, 2011

Little Wooden Cuteness

I absolutely love the internet, and not just because it allows me to see pictures of Alex Skarsgard in various states of undress whenever I wish . . . umm, but because it inspires me with lots of new crafting project ideas.
I came across this wooden peg matching and sorting dolls project on Gluesticks and it inspired me to make one of my own for my best friend's daughter's birthday. It was a great addition to the fabric doll I made her.

I couldn't find the cute little wooden doll pegs that Gluestick used but I found these that were a bit chunkier, which I thought would work better since the birthday girl is only 1 and these would be easier to grasp.

I also mounted the candle cups on a piece of wood. I figured this would make it easier to keep track of them all. The cups already had holes in the bottom of them so I literally just had to secure them to the piece of wood with screws.


I made sure to sand the edges of the wooden block also so that when she inevitably smacks her older brother over the head with it, it won't bruise nearly as bad.


I had a hard time keeping it away from my kids before I got it wrapped up.

I had so much fun making these that I was kind of sad to see them go too. I might have to find an excuse to make some more.

Saturday, February 19, 2011

Quick and Easy Fabric Doll tutorial

My best friend’s daughter is turning 1 this weekend. My kids call her Baby Kayla. Not “Kayla”, but “Baby Kayla” which is incredibly sweet. It might not be so sweet if they’re still calling her that when she’s 15, but for now we’re sticking with it.

Of course I had to make her gift. I struggled for quite a while trying to come up with something appropriate for her age and finally decided on a doll.

I wanted it to be soft and washable, with nice long sturdy arms and legs that she could drag her around by. Of course there are countless ways to make a simple fabric doll but this is what I came up with. The design is not purely original since I’ve seen dolls similar to this in stores, but I thought I’d share the pattern that I drew up and instructions on how to put her together.

Click Here for the pdf pattern

Supplies:

Fabric: I used cotton. You’ll need a color for the face/arms, one for the body and one for the legs. You’ll need minimal amounts. Perhaps a fat quarter for the body.

Fleece: just a decent sized scrap for the hair. You could also use felt.

Stuffing: I used polyester fiberfil

Marking pen or chalk: some pattern pieces will be drawn on the fabric and then sewn so you’ll need something to mark your fabric.

Fabric or permanent marker: I used this to draw on the face but you could embroider the face or use buttons or other options.

General sewing supplies: sewing machine, thread, scissors, etc.

Let’s start with the appendages. You’ll notice on the pattern that the arm and leg pieces do not have a seam allowance. This is because it’s much easier to simply draw the pattern shape on the fabric and sew directly on the line. This allows the shape of the hand/foot to be much more accurate than if you cut out the piece beforehand.

Place your arm/leg fabric right sides together and sew directly on the marked line. Leave the end open for stuffing. Then simply cut around your sewn pieces, turn them right side out and stuff with polyfil. The pieces don’t need to be stuffed all the way to the end since about an inch of the arm/leg will be sewn inside the body.

Now let’s start on the body. Before you cut out your body pieces you’ll want to piece the head fabric onto the body fabric. Cut pieces of each fabric that will be large enough to accommodate your pattern and then seam them together.

Then place your pattern piece onto the fabric, making sure to line up the line between body and neck on the pattern to your seam and cut out 2 body pieces.


Before we can sew the body together we’ve got to work on the hair and face. Cut out the hair pieces. Seam allowance is included in these pattern pieces. I chose fleece for my doll’s hair because the ends don’t unravel and I felt it would be softer and more durable than felt.

Lay the front and back hair pieces on the head and stitch down along the bottom edges. For the pig tails, cut out 4 pieces. Sew 2 pieces together for each pig tail and set those aside. We won’t need them until we get ready to put her together.

Options for your doll face are limitless. I chose to draw on a face using permanent marker. I used these Micron markers which work great on paper and fabric. If you’re going to draw on your face you might want to test your marker on a scrap piece of fabric to make sure it’s not going to bleed or do anything funky.

You could also embroider on your facial features, or cut them out of felt and sew them on. Some stores even sell iron-on doll faces which would be cute as well.

Make any other embellishments to your doll at this time. I made a little felt flower for the front of my doll. A little pocket would be cute too etc.

Now it's time to attach your doll's hair and arms. Place them where you think they look good and then turn them in toward the inside of the body. Cover the front of your doll with the back body piece and pin in place.

Sew around the body leaving the bottom open. Turn your doll right side out and stuff firmly. Don't stuff all the way to the bottom edge.


Turn the bottom edge of the fabric under and pin your legs in place. I closed the bottom seam on my machine. It was a little awkward but not impossible. You could hand sew the bottom opening closed if you prefer.

And, she's done!

As always, if you have any questions or if something isn't clear, leave a comment or shoot me an email at pinandpaper@q.com.

Friday, February 11, 2011

Who's Obsessed?

Owl's are really in now right? I've been trying hard to resist jumping on the bandwagon but recently I've just given up and embraced it. I've slowly started adding some hooters into my decor (and I'm not talking about women in orange hot pants who serve wings - much to the chagrin of my husband).

I found this set of brass ones at the flea market a few months ago for $6.

This planter was on sale for $2.50 at Hobby Lobby. I love how my spiky succulent looks like out of control head feathers.

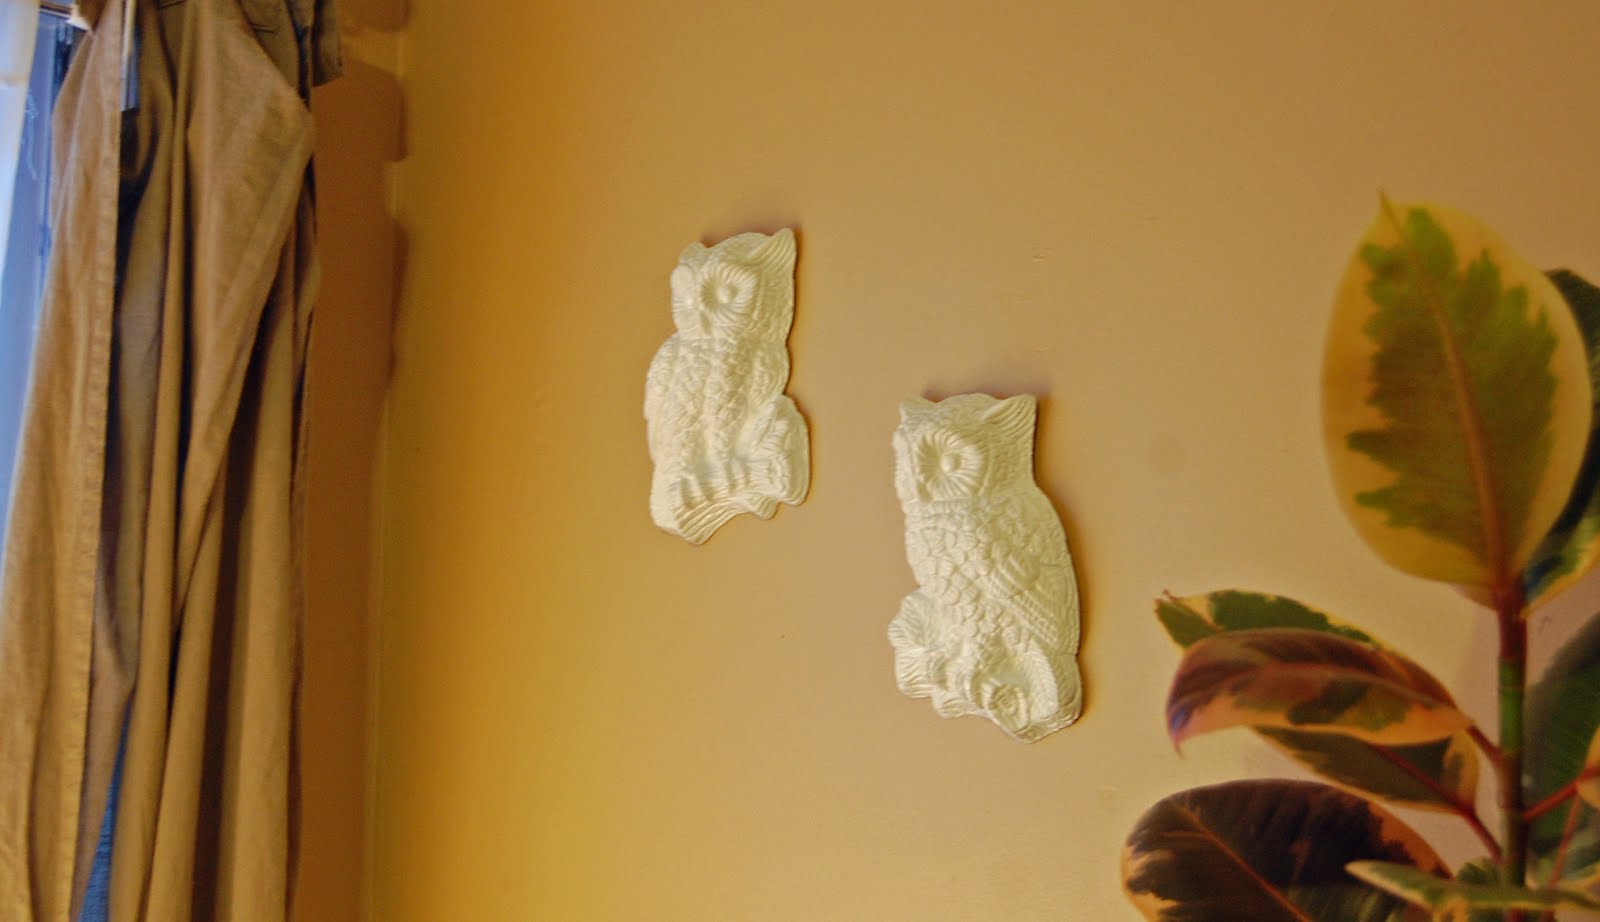
My most recent trip to the flea market netted me these gems for only 50 cents each!

They were a little too 70's for my style so I grabbed a can of Krylon fusion spraypaint (because I'm not sure what substance these things are made of) and gave them a quick coat of white.

They're a welcome addition to a blank space of wall in my living room. I don't know if I'm completely happy with them yet. I feel they need to be paired with some other things to really make them pop, but right now I'm enjoying them.

How about you? Have you embraced the owl revival?

Tuesday, February 1, 2011

Rhinestones are a girl’s best friend


When I was a little girl I would pry open the lid of this box and immerse myself for hours in the wonders it possessed.

My great grandmother’s costume jewelry:


And now all these years later they’re mine and the wonder and joy of them have not diminished in the least.

Unfortunately some of them are beyond repair, but most of them are in great shape and just need a little TLC.


I’ve already repurposed some of the clip on earrings that have lost their mates, into rings. The rest I plan to leave as is.


And I found my old Cabbage Patch ring! "Memories, like the corners of my mind . . . "

These two have always been my absolute favorites. When I was a girl I would pretend they were real diamonds and I was a princess.

My little princess gets to wear them now too.

I showed her how I used to wear them while pretending to be an exotic dessert princess.

Maybe now I'll find some occassion to wear them myself - and I'll make my husband address me as, "your ladyship".

Monday, January 24, 2011

In which I rant in length about my disdain for bobbins

I adore sewing. I’m not just talking about the finished products; I’m talking about every aspect of it: The whir of the electrical motor, the clicking sound it makes when the presser foot is lowered, the sensation of pushing the pins into the fabric, the movement of the fabric under my fingers as it’s pulled and stitched. The whole thing is like a soothing symphony.


However, there is one thing about it that irritates me above all else: bobbins. You see I hate winding bobbins. I despise it. I think because they’re such a distraction when they run out. I could be right in the middle of a nice long stretch and the bobbin runs out and I have to stop and unthread the machine, and thread another bobbin and then put it in – it totally disrupts my rhythm. It’s like the orchestra stopping in the middle of Beethoven’s 5th because the lead violinist has to take a piss (see how I worked in that symphony analogy from paragraph one? That English degree is paying off now baby!).


I try to combat these interruptions by preparing ahead. If I’m working on a large project that I know will require more than one bobbin, I usually wind as many as I think I will need ahead of time, before I even begin sewing. This way when it runs out I simply have to replace it and don’t have to unthread, wind a bobbin, and rethread one.

This helps a little bit, but it’s still annoying. Speaking of annoying, doesn’t it always seem like it runs out when you have 3 inches left to sew? Every stinking time! You’re sewing along, you’re in the groove. As soon as you finish that seam you’re on your way to the next exciting step in your garment/project creation, and boom; bobbin thread runs out with an inch and a half left to go.

Or my favorite is when I’m working on something large and/or unwieldy, and I’ve just spent a good 3 minutes and performed several yoga moves that I didn’t even think were humanly possible, to maneuver it underneath the presser foot, I make 3 stitches and BAM – out of bobbin thread.

And don’t even get me started on how much thread you waste by having all these little leftover bobbins with varying lengths of thread on them.

I hate you. I hate you all.


You’re thinking, “What’s your point here woman? Why are you rambling on about this?” and the truth is that for some reason I think you’ll care. And also to point out to any would be inventors out there that this bobbin issue is one that you need to be working on. We as a species can fly to the moon and program a plastic bass on a plaque to sing “Take Me to the River” but nobody can figure out how to rig a sewing machine so that I don’t have to deal with bobbins?

People are out there inventing pajama jeans and shake weights but nobody can figure out how to improve the bobbin situation? It’s a tragedy is what it is. Why can’t the bobbin thread pull from a full spool like the top thread? I’d readily purchase two spools of thread of the same color to never have to wind a bobbin again.

You’re probably thinking, “well if you have such a clear idea of how this should work, why don’t you invent something?” That’s not my forte people. I bitch and then wait for other people to solve the problem, or to at least commiserate with me. That’s how this works so let’s get on it people.

Monday, January 10, 2011

Strollers and Diapers are not nearly as cute

My friend Angie is expecting a baby girl and while I could certainly purchase something for her upcoming baby shower off her baby registry, what would be the point?

I mean who needs diapers? Onesies? baby bottles? Come on, completely overated!

Eveyone knows what babies really need: adorable booties


These are my favorites:


And of course a hat.

But as I gazed upon the cuteness of my creations I started wondering; "Why didn't I make my own daughter some cute stuff like this when she was a baby?" And then I remembered why. Because she was my 2nd child and quite frankly I was just too damn exhausted.
So congrats Angie and prepare yourself for the ensuing fatigue!

* baby booties were made from a free tutorial at shwinandshwin. Check out their site, they have great tutorials!
*crocheted hat was made from the scalloped beanie pattern by InnerHooker

Wednesday, December 22, 2010

Textured Stripes Knit Scarf

There is an overabundance of scarves in my house and so when the weather started turning cooler and I donned a scarf, my daughter insisted that she have one as well. I brought out my bushel basket (yes, I literally have a full sized bushel basket full of scarves and mittens etc.) and told her to pick one out.

This one? No, too stripey. This one? No, too fuzzy. This one? No, too pinky. This one? No, to ruffly. Yep, she actually said “ruffly”. So what’s a knitter and a mother to do than to custom make the kid one.

She picked out her own yarn color and I made a small swatch first to make sure she approved of my pattern and within a week her new scarf was born.

Not too stripey, fuzzy, pinky or ruffly.

It was super easy and super quick. See below for the pattern. Well actually it’s just instructions. I don’t have much skill/experience with writing good knitting patterns.

You'll need:
Yarn – I used Threads and Loops - Aqua
Knitting needles – size 8 US or whatever size works well with your yarn and desired size.
Cast on 25 stitches

Row 1 – 10: Stockinette stitch (alternate rows of knit and purl) you’ll start with a knit row and will end on a purl row

Now you’ll reverse your stockinette so that the purl side is on the front and the knit side is on the back. This creates the bumpy stripe.
Row 11: purl
Row 12: knit
Row 13: purl

Reverse your stockinette stitch again. This will make the mini knit stripe
Row 14: purl
Row 15: knit
Row 16: purl

Repeat until you have 3 textured strips on the front side of your scarf and then do 10 more rows of stockinette stitch and then start your stripes again.

Continue until you reach the desired length. Here's what the top side will look like:

And the back side:

I hope that makes sense. It's a really cute textured scarf and a great project for a beginning knitter to practice their knits and purls.